 CONTENTS
When Should I Use the Entry/Exit Position?
When Should I use the Examination Position?
What Functions Can Be Adjusted Using the Handset/Foot Controller?
Can the handset be fitted on the other side to make it more accessible in our room?
How do you clean underneath the chair?
Is there a button to make the chair go flat for emergency scenarios?
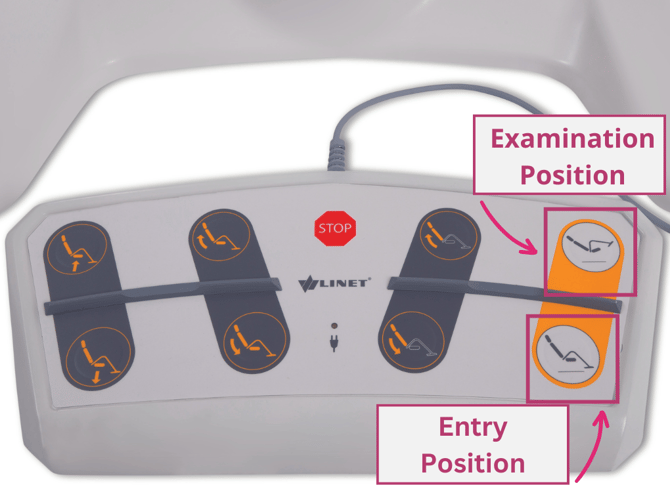
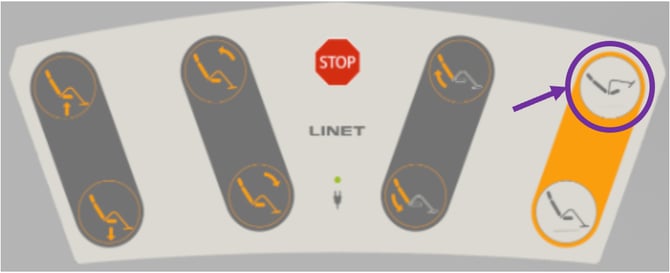
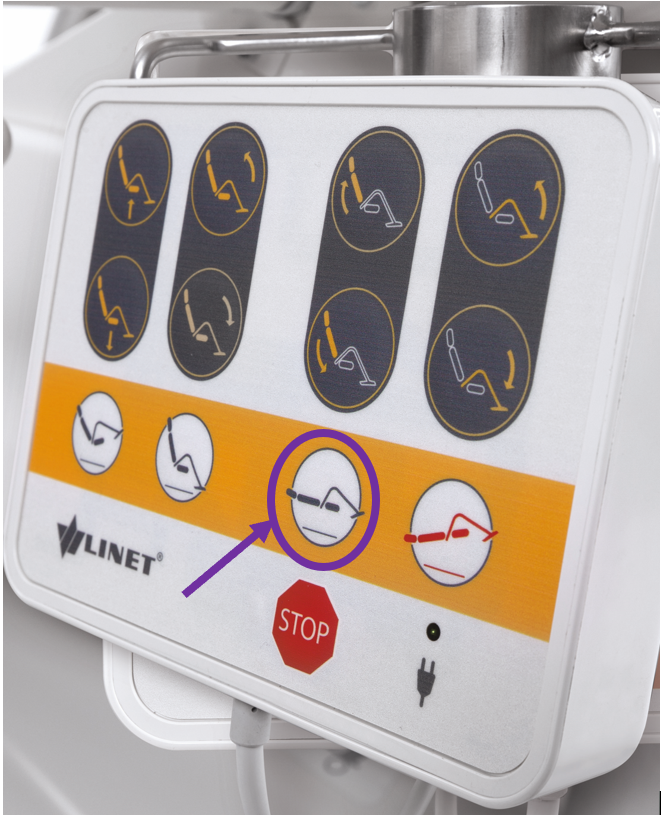
When Should I Use The Entry/Exit position?
This is a button in the yellow section of the handset/foot controller.
When you press and hold it down, the chair coordinates three different movements:
- The chair moves to its lowest height position
- The backrest raises to support a seated entry/exit
- The leg supports move to their lowest height position
Whenever you let go of the button, all movements will stop
This button should be used to set the chair for a patient to get on the chair at the start of the appointment, and when the examination is complete and the patient needs to get off the chair.
Click this link to watch a You Tube video of how to:
Please note that this video shows the optional boarding step.
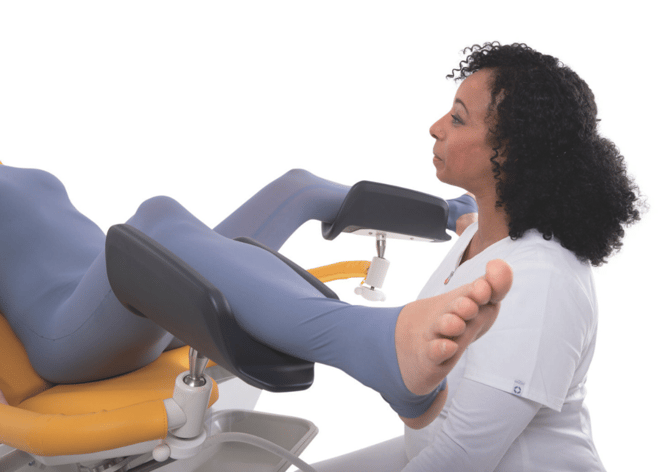
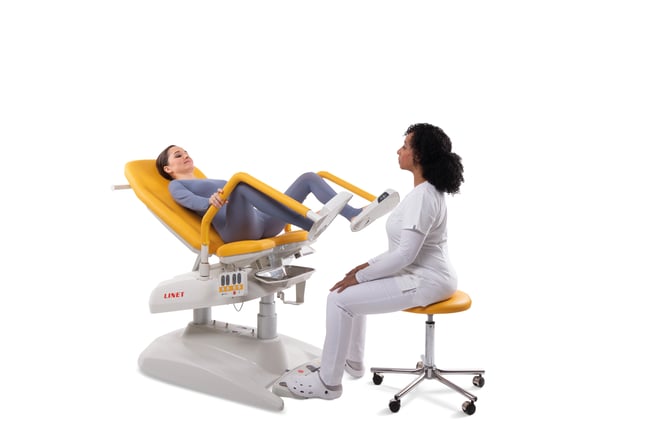
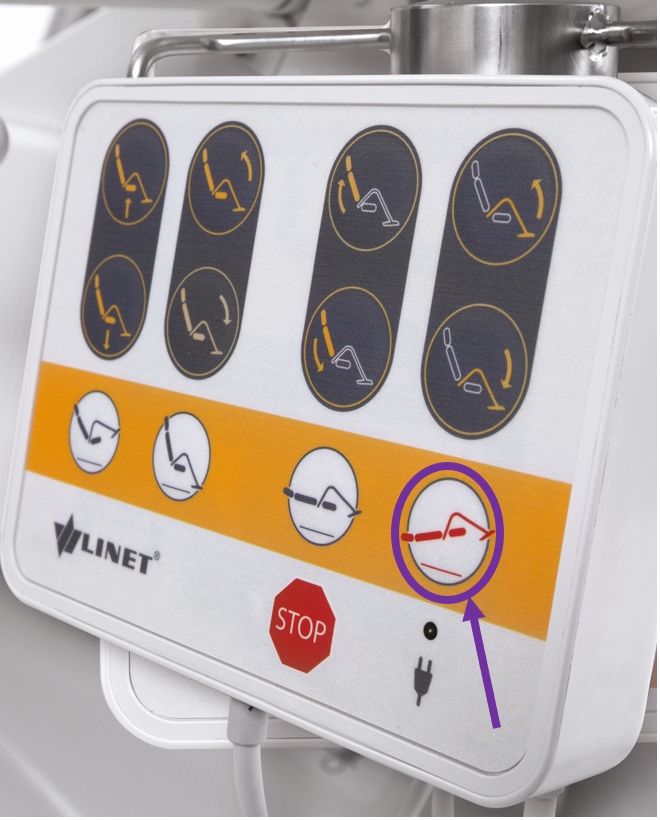
When Should I Use The Examination Position?
This is a button in the yellow section of the handset/foot controller.
When you press and hold it down, the chair coordinates three different movements:
- The chair raises to its highest height
- The backrest lowers to support a semi-recumbent position
- The leg supports raise to support an examination position
Whenever you let go of the button, all movements will stop.
This button should be used when the patient has sat on the chair and is ready to move into the examination position. It achieves a standard position that can be used for the procedure, or tailored slightly using other buttons.
Click this link to watch a You Tube video of how to:
What Functions Can Be Adjusted Using the Handset/Foot Controller?
These functions are all shaded in grey:
- Hi-Lo Height Adjustment
- Seat Section Raise and Lower
- Backrest Raise and Lower
- Leg Support Raise and Lower. Handset only
Advanced positions are all shaded in yellow:
- Pre-Set Entry/Exit Position
- Pre-Set Examination Position
- Pre-Set Ultrasound Position (flat). Handset only
- Pre-Set Trendelenburg Position (head down tilt). Handset only
Whenever you stop pressing the buttons, the chair will stop moving.
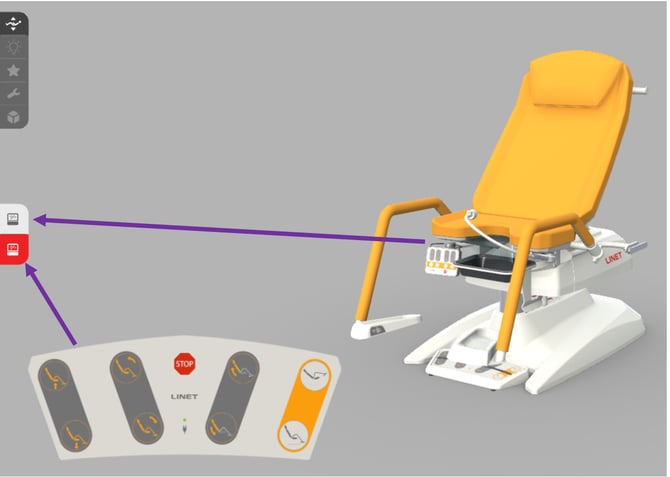
You might also find this 3D interactive webpage useful. You can click the buttons of the handset/foot controller to see how the chair moves.
Select the handset or foot controller tab and then click the button you want to see profile.
Click HERE to view the 3D Interactive Webpage.
Can the handset be fitted on the other side to make it more accessible in our room?
Yes. The handset can be configured to be fitted on either the patient’s left or right-hand side. The LED lamp must always be located on the opposite side to the handset. The fluid bowl will always be fitted to rotate away from the handset.
It is not possible to fit the handset and the optional IV pole on the same side. It the IV pole is required, it must be fitted on the opposite side to the handset.
How do you clean underneath the chair?
The plastic shroud is there to protect the base and make cleaning easier by covering the metal frame. If you want to clean underneath the chair, just slide the plastic base up the column and clean as necessary.
Is there a button to make the chair go flat for emergency scenarios?
There are two buttons that might be useful in emergency scenarios.
On the handset control, press this button to return the chair to a completely flat position:
On the handset control, press this button to achieve a Trendelenburg tilt position:
How can we move the chair?
Well, if you just need to move the chair to clean underneath then the quickest solution is to slide the plastic base up the columns and clean accordingly. You won’t need to move it at all. However, if you do need to move it then follow the steps below:
- Press the entry/exit button until the chair is at its lowest height
- Stand facing the chair and lift both the leg supports until you can feel resistance (approx. waist height)
- Lift the leg supports by a few cm to release the middle transport wheels. You can now move the chair
- To dis-engage the middle transport wheels, lift the leg supports by a few cm and the wheels will retract. The frame will sat back on the floor
The transport wheels are fine for moving the chair within the room, but if you need to regularly move the chair between rooms, you may wish to consider a more mobile alternative.
Which leg rests are standard?
These are the standard leg rests and they are popular because they offer a more dignified position during examination.
.png?width=670&height=950&name=Graciella%20standard%20(no%20bg).png)
However, we recognise that some patients may prefer to use a more traditional “goepel” leg rest, so these are available as an alternative. They can be useful to have as an alternative option for patients with compromised physical capacity, or those that are shorter and need something that can be positioned closer to the seat.
The standard leg rests are easily removed by unscrewing the locking cog. The goepel leg rests are then inserted and secured by tightening the locking cog. The whole process takes less than 60 seconds. You can also use the goepel leg rests on any Graciella chair, should you have multiple chairs and want to share the goepel leg rests.